Arches are quite common. The reason I’m bothering to write about mine is because of how I got it to work in xLights, which was a bit tougher than expected. The build pictures are, therefore, mostly for context, though I guess you could use my 3D printed clips, too, if you want.
Physically Building the Arches
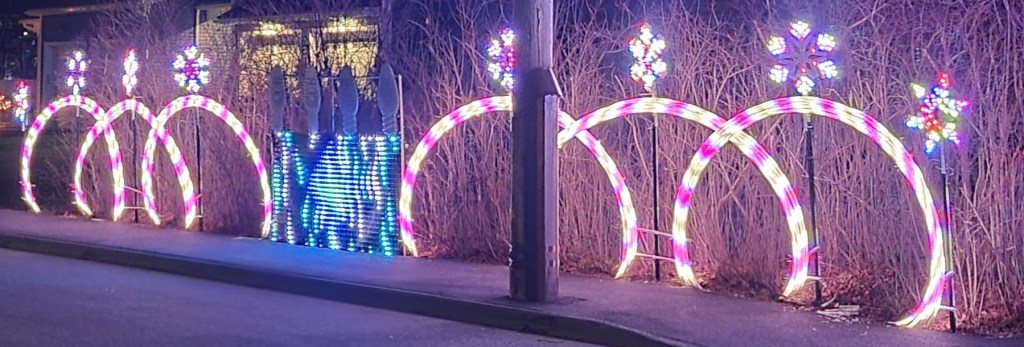
For the hedge area in my display, I wanted some fair-sized, multi-layer arches.

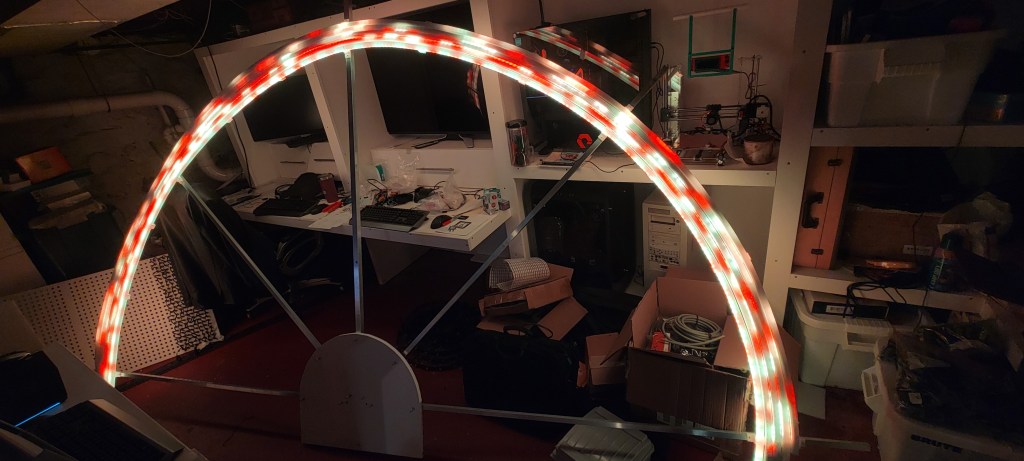
There are a lot of popular techniques for making arches. Some put bullet nodes in plain sight in an arch pattern, others use pipe or tube in various ways. I prefer the diffused look of 3/4″ white PEX tube with LED strip inserted.
I tried a variety of pipe options from the home improvement store. 1″ PEX was easier to slide the LED strip through, but it wasn’t as bright and was a bit less cooperative when bending. PEX-A has a slight orangish caste to it in the daytime, didn’t look quite as nice in the dark either, so I went with 3/4″ white Sharkbite PEX-B.
The arches were basically sized with 5m LED strips in mind; I used 60/20 RGB strip, which has 300 LEDs in 100 sections that can be controlled. Slipping these 5m strips into the PEX tube is not that easy. The method is simple… slip a fish tape through the PEX, cut the female end of the LED strip down a bit, leaving a stub to attach the fish tape, pull the strip through. Then, cap the ends (in my case, I used a bit of hot glue with some wadded up coro to help it bridge the end.

In reality, this is straightforward on a 2m mini-arch, but not delightfully easy on a 5+ meter piece of PEX. We used 3 people, one to pull the fish tape, one to guide the LED strip into the far end, and one in the middle to help hold the PEX straight.
Mounting the arches for 2021 was a matter of optimism… and loads of zip ties. It was already December, early-approaching-mid-December, and I was in a hurry. I had garden/fence stakes hammered into the ground, planned to ziptie spare bits of pipe to those, and then zip tie the arch tubes to that, with some other bits of pipe ziptied along the way to maintain clean spacing. It was time consuming, and a bit sloppy.

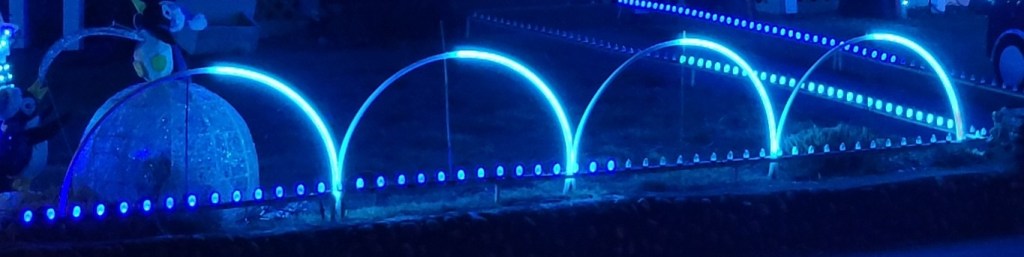
Lit up, they were OK, I guess. (One thing I did when they were lit up was sharpie an index mark on the tube at the middle of the LED strip so I can get better alignment next year.)

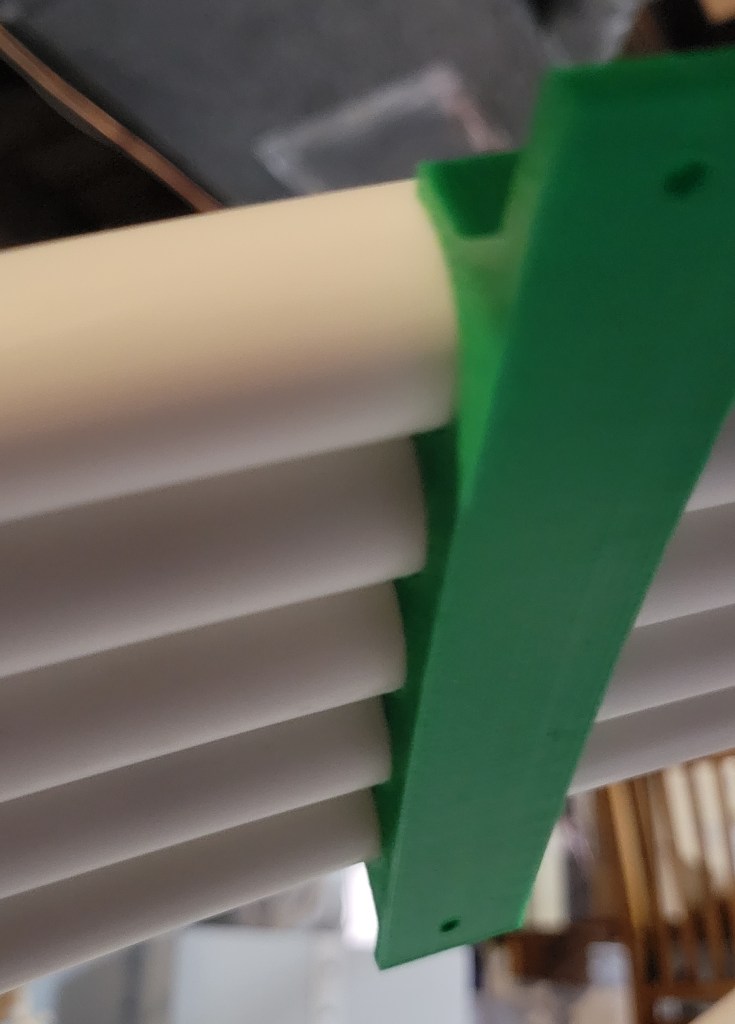
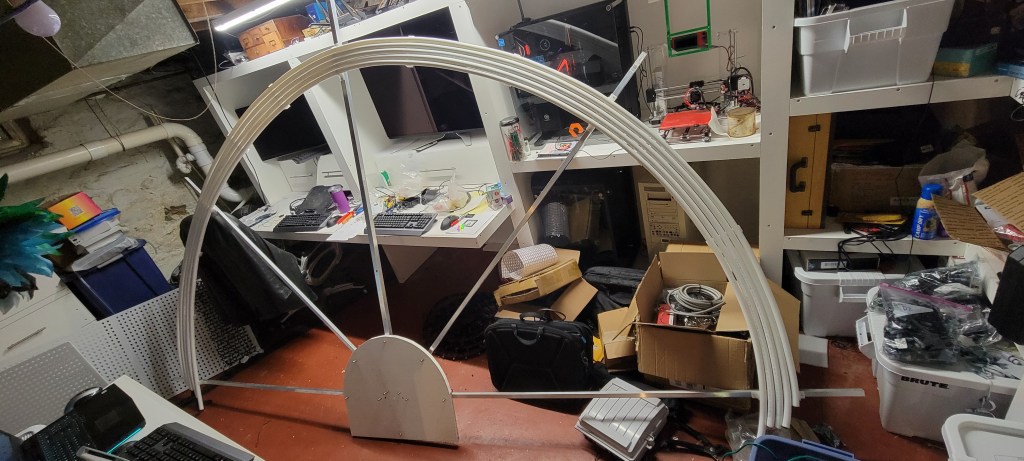
I decided for 2022, I want a much cleaner, easier, setup with less of the work done in the field. The overall plan was to build a frame of aluminum channel, radiating outward from the center, and clip the tubes to that. I designed 3D print clips to replace all the zipties.

There are two 3D print files for this:
- A clip that screws on to the aluminum frame that radiates from the center
- A spacer that can be clipped on to the pipes to keep them tidy mid-span
Making the frame and attaching the clips went to plan. I used some PVC board I had lying around, and decided the frame would be best if it had quick-pull pins in it so it can be collapsed down for storage.

Controller Connections and xLights Modeling
Controller connection to the arch last year (2021) got a bit messy. This had to do with some limitations of xLights, the controllers, and the decision I made to nip off the female end of the strips and seal the end of the tube. Also, I was in quite a hurry as at this point it was mid-December.

In my head, the arches were going to be connected to smart long range receivers, located close by the near ends of the arches. However, there were a couple of xLights limitations here:
- The xLights arch model for layered arches has a wiring pattern that “zigzags” back and forth across the arch. This makes a lot of sense, except in my case where I cut the connectors off and the easiest place to start again is back at the controller side.
- The xLights arch model only supports one controller connection, so configuring the strings was going to have to be done in the controller
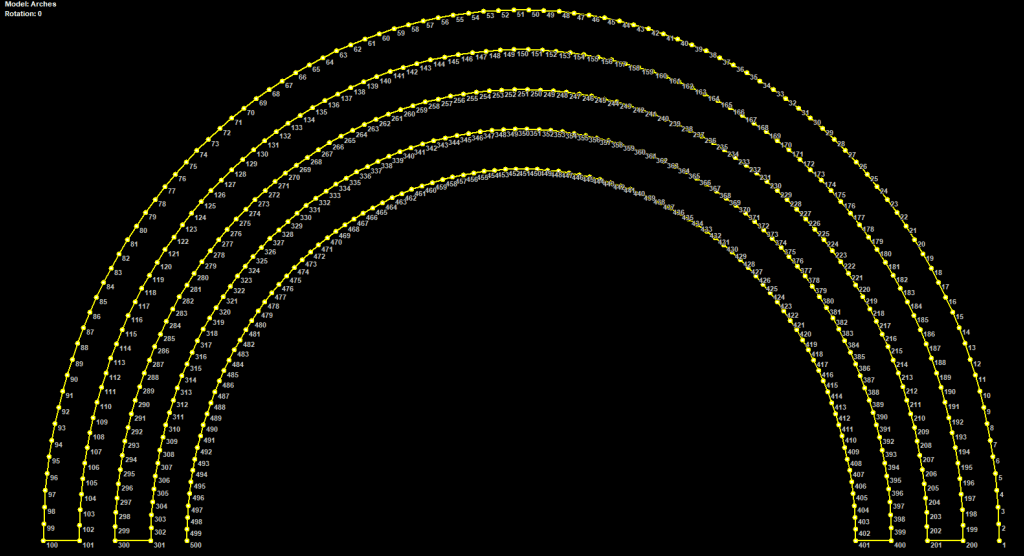
I was not able to figure out how to get the smart receivers configured to handle 5 ports splitting up the string of 500 nodes xLights assigned. It’s probably possible, but I couldn’t figure out how to do more than 4, and opted to assign the 500 nodes to a port on the main controller, then go spread the string out over the next 4 empty ports. Wires were run to the far end of the arch to make it behave like xLights. These were long enough runs to require data amplifiers, without which many of the tubes would “lock on white” after they pulled the ground voltage up too far to read the data signal, as Keith explains so clearly in this video.
The correct answer would have been to use a custom model. I know this, because I have one now, which can be found here. How you get the custom model is a topic of interest. You can export an arch model from xLights, add a few submodels, and it is suitable for use as a custom model; it’ll render like the arch for all the effects, and you can split up the controller connections however you like. The only hurdle is that it does still “zigzag” and that’s not what we want.
There are options to fix this:
- Manually mess with the custom model to reverse the substring numbering for half the strands
- Change the xLights source code to enable a non-zigzag wiring pattern.
Shockingly, I opted for the latter option. That code is here.

I plan to ask the xLights developers if they’d like to include it; I understand if they do not (as it is a very limited application, needs added to the manual, tests, etc.), but it was still fun to learn enough about xLights code to make it work. I’ll be fine either way, as I used that modified code to export my arch as a custom model, and it will import into any xLights just fine.
Anyway, I’m looking forward to the 2022 season, and an arch that is much easier to set up and wire, and where xLights will auto-upload the controller configuration. Gonna be a fun season, with that and so many other upgrades.
