Update April 10, 2023: These were shipped in xLights 2023.06.
Update March 28, 2023: After discussion with other developers, the word “elide” has been changed to “suppress”.
Introduction
I am easily dazzled and mesmerized by spinner-like props… anything with rotational symmetry. While the crowds only seem to care about singing faces and whole house effects, I can’t help it… I love detailed effects on HD props. That’s why, for 2023, the number one thing I had to have is a Showstopper Spinner, which is what I’ll be using for many of the examples below.
Now, it turns out that using HD props can be hard work. It all comes down to whether it works well in your sequence… to get results like the video above, you need effects to show it off, and most of those effects rely on submodels.
As a prolific importer of OPS (Other People’s Sequences), I need easy ways to import the effects from the props the vendor sequenced to props that I actually own. This is often made easier by adding submodels and groups to the models, or otherwise adjusting the submodels to suit my preferences, so there are suitable targets for imported effects.
Of course, adding submodels can be quite tedious and error prone. I suffer the three virtues of a programmer, and would much rather spend a day working on code than an hour clicking pixels in the submodel dialog. So, I added some utilities.
Rotational Symmetry
One of the most painful things with submodels on spinner-like props is getting perfect rotational symmetry. It seems to be a tedious, manual process, and a lot of models out there have a pixel off here or there. (The early version of the Showstopper Spinner is no exception; it’s understandable really, and they’re still working on it.)
So, let’s make the computer do it! (I am going to assume some familiarity with the basics of submodel dialog here. If you need a refresher, I recommend the Pixel Pro Displays video, or others like it. But stop after you make the first strand!)
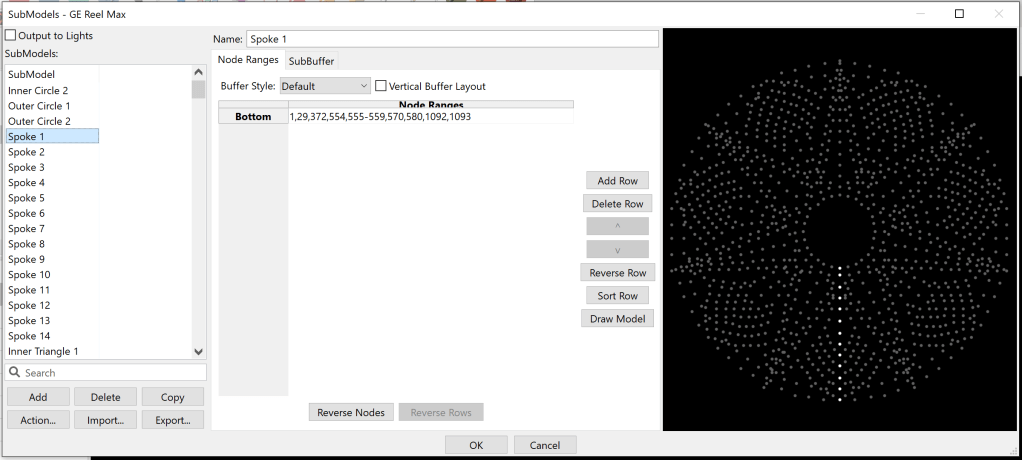
Open up the submodel dialog, add a new submodel, and draw something interesting.
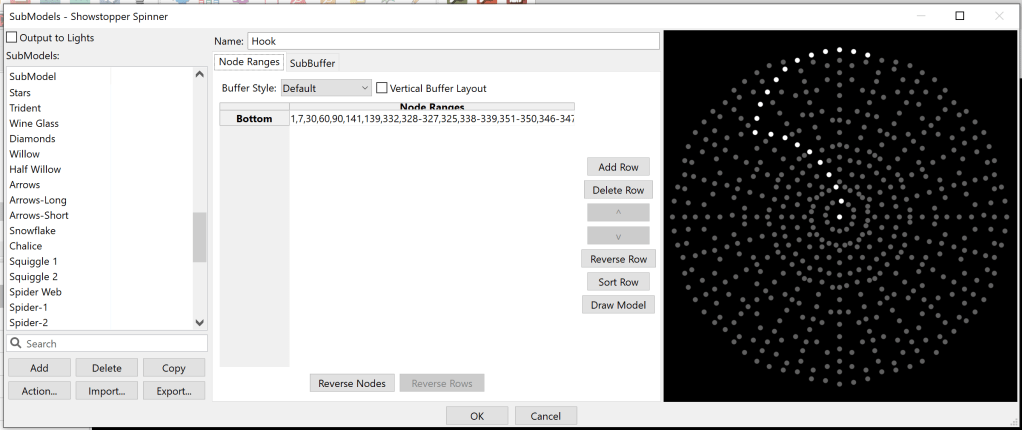
So far, so much the same. Now, right click (in xLights, if in doubt, try right-click!) and pick “Symmetrize (Rotational)”
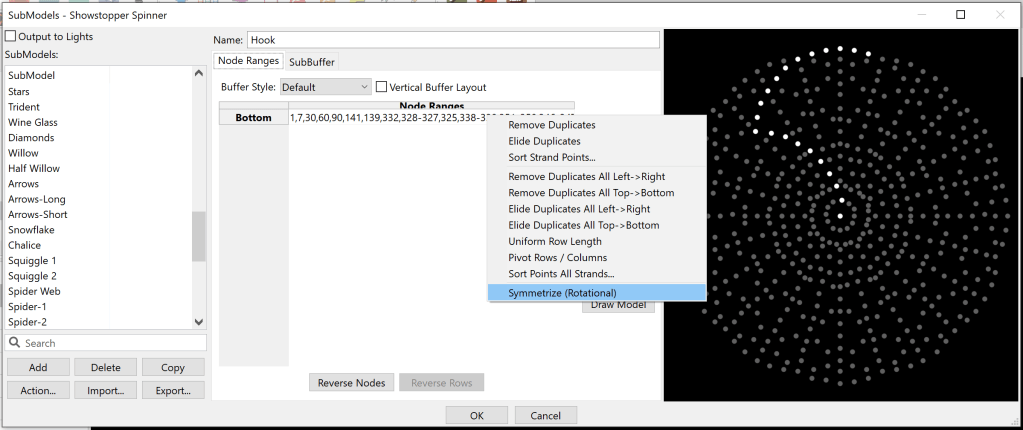
It will ask for a degree of symmetry. This will be the number of copies when done. For the Showstopper Spinner, 12, 6, 4, and 3 are good. I’ll pick 12 here.
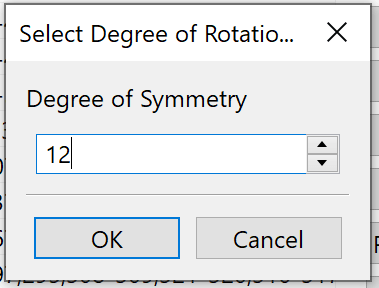
In this case it will also ask if there is a center node. (It only asks if it thinks there is one.) (Likewise, if it thinks your model is squished horizontally or vertically, it will ask if you want an aspect ratio correction. Try it.)

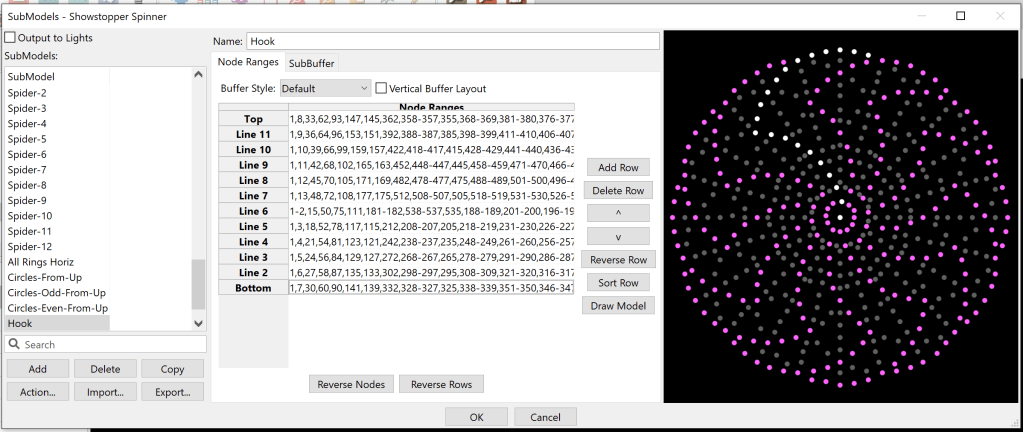
And here you have it… 12 copies!
Known Limitations: This does not work on props that don’t have perfect rotational symmetry, such as the beloved Hattitude (which has a bunch of stuff superimposed on the spinner) or the SpinReel Max (which is not quite symmetrical if you look closely… some branches are separated by 4 pixels, and some only 3…). If you get an error, a log will pop up. If you think it is in error, please send me that log.
Multi-Strand Submodel vs. a Group of Submodels
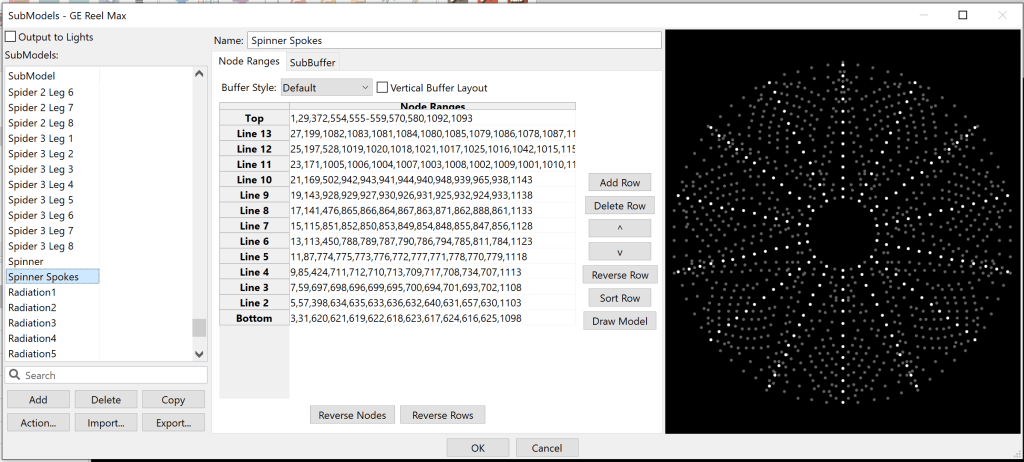
Some models / vendors use groups of similar submodels and then sequence to those groups, allowing the group to have disparate stuff under the same group name for easy import, and to arrange the group order to suit render order. For example, a spinner is a group of individual strands, in the “All Spinner Spokes” group:
Another approach is to make a multi-strand model, which has the benefit of being a lot less cluttery:
I’m not here to take sides on the debate, but rather to tell you how easy it is to convert between the two schemes. For combining many submodels to one, there’s always been a “Join” feature on the right-click menu:

However, going the other way has not always been easy. For that, you can now right click and choose “Split” to make multiple submodels from a stranded one:
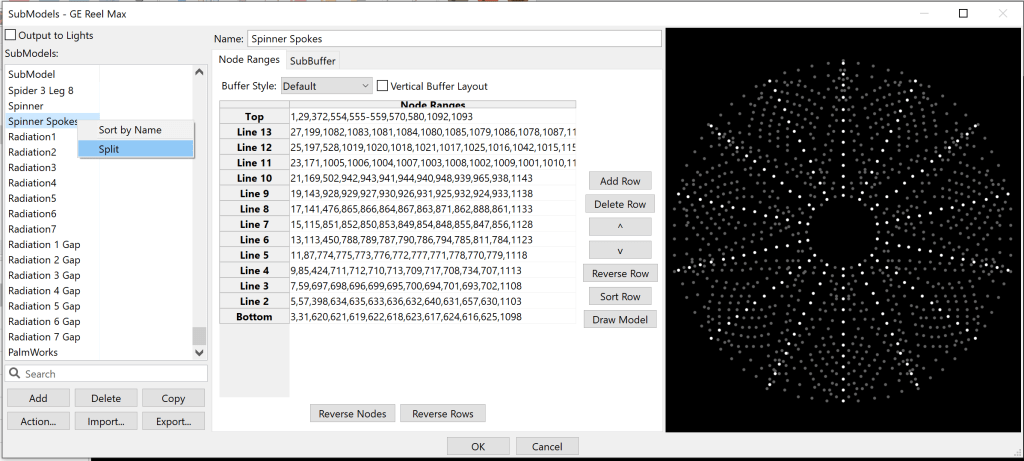
Note: The name of a joined submodel is “Submodel-<n>”, which you can rename. The submodels created by “Split” are named after the source model.
Sorting Nodes Geometrically
Picking the nodes for a submodel may be tedious, but picking the nodes for a submodel in the perfect order for chase effects is very tedious. The existing xLights feature to “Sort Row” is good if the numerical order of the pixels is working in your favor.
If the order is geometrically simple, there’s a right-click option for you…”Sort Strand Points Geometrically…” or “Geometrically Sort Points All Strands…”
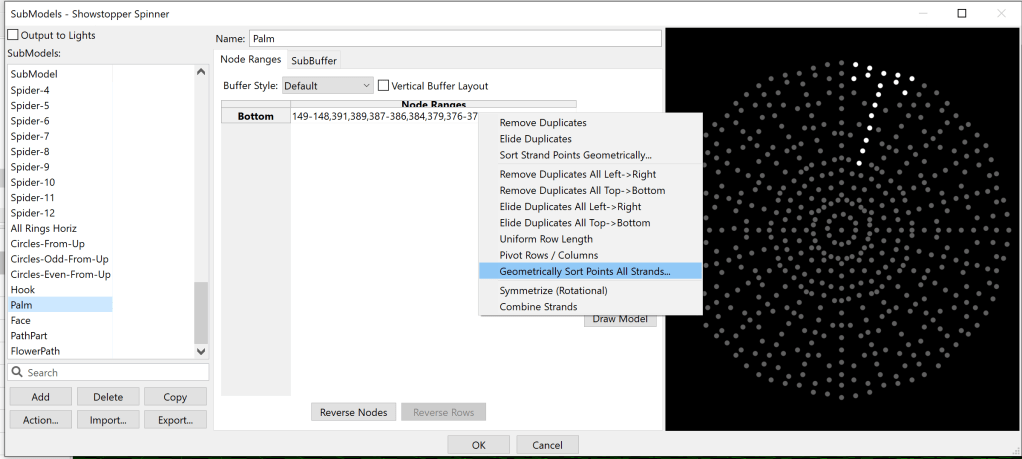
The choices presented are admittedly a bit daunting:

Some descriptive examples may help here.
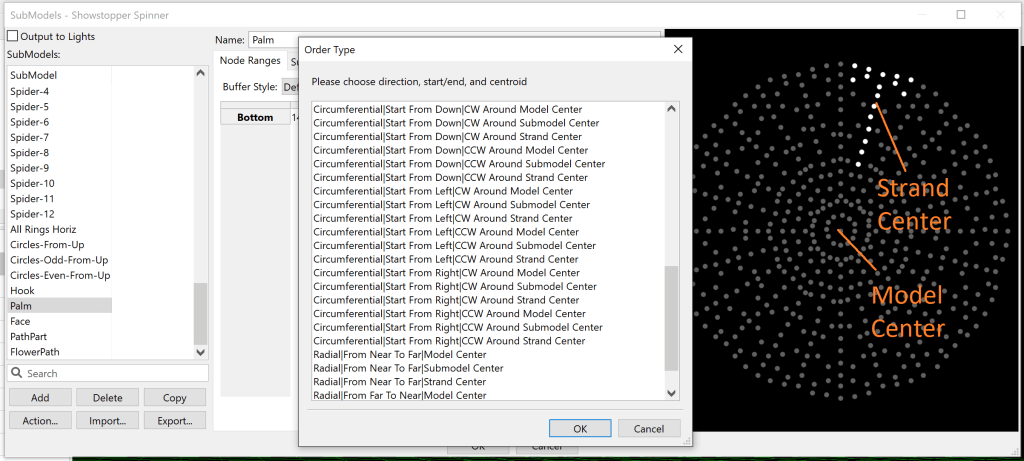
Say we want our palm tree (above) to light up from the bottom of the trunk and head toward the fronds. This is a Radial motion, where the points are sorted by distance from Near To Far relative to the Model Center. If we wanted the reverse motion, we could pick Far To Near, or if we wanted the model to light from the middle of the tree outward toward the fronds and trunk, we could pick Strand Center.
For the next example, let’s look at Circumferential motion, which is motion around a point, not toward/away from it. The Showstopper Spinner has these really cool circle submodels, and if you put chase effects on them you can see that the chases start from the inside of the model and work their way clockwise around it:
Let’s try something different… what if we wanted all the chases to start at the top of their circles, and go counter clockwise? In that case, we would choose a sort that is Circumferential, CCW Around Strand Center, Starting From Up:

Now, our chase effect looks like this:
For our last example, consider the spinner’s “All Rings” submodel:
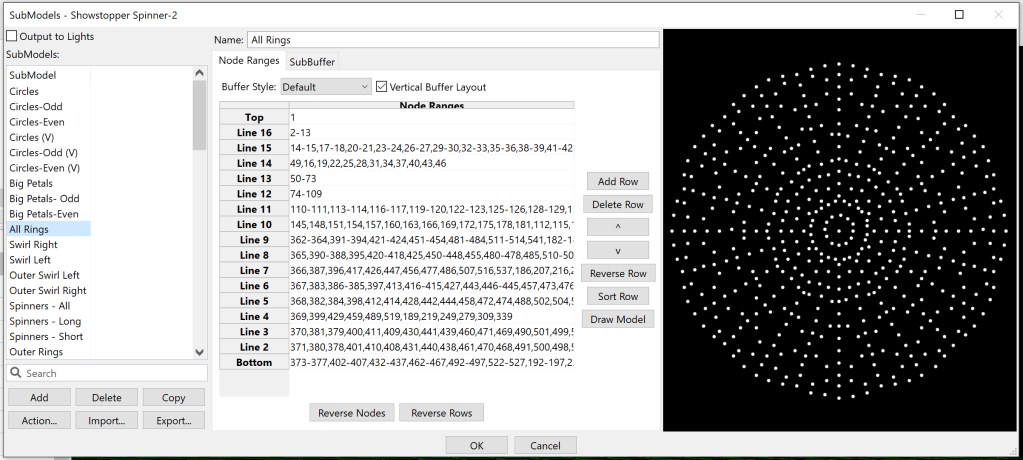
Note that it is a “Vertical Buffer Layout”. If we do a color bars “Left/Right”, we may hope that it would wash in and out on the model, and that if we did “Up/Down” it would go around the outside of the model. The first one works, the second one isn’t what we might prefer for some applications:
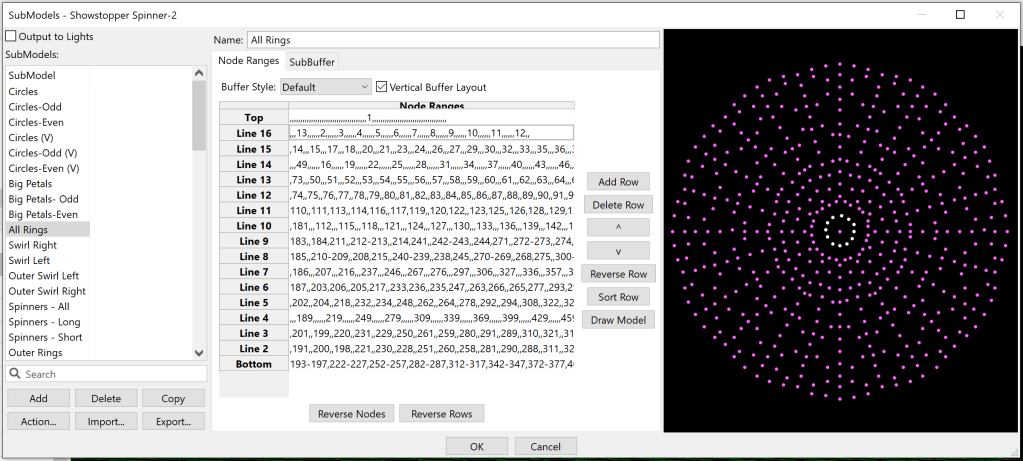
The first thing we might want to do to make it proceed naturally around the rings is to use the geometric sort feature. Let us sort them from the bottom, clockwise around the model (That’s Circumferential, Start From Down, CW Around Model Center):
This is a bit better, all the bars seem to start at the bottom. However, we notice that it still looks a mess. The problem is that the strands are not all the same length / they do not have the same number of nodes. This makes the circumferential travel uneven, and is a good segue into the next section.
Evening Out Rows
Starting with the rings model above, we’d like to stretch out the rows so that there are the same number of nodes on each strand. We can use placeholder nodes, empty between commas, “,,”, to take the spot of a node.
To do this manually would be painful. Right click to the rescue… “Uniform Row Length”…

Caveat: You may not want to do this to the vendor-supplied submodel… if they sequence to it the results could be wildly different. This evens the spacing without any regard to geometric location, so it isn’t perfect. A few manual tweaks can improve it a bit.
(This example is a bit silly… the pinwheel effect done “per model per preview” would do the same thing in a much easier way, but so it is.)
Eliding Duplicate Nodes
When generating submodels with rotational symmetry, it often turns out that the same node is present in more than one strand. For example, consider the circles in the Showstopper Spinner model:

Now, this seems fine at first. By design, we want all the circles to be the same, so they need all their nodes. However, this does have a couple of quirks:
- When xLights renders to the whole submodel, it won’t know exactly what to do with the nodes that are present more than once. Generally, the first occurrence in the first strand using the node is the one to control it. This would make our first circle take priority over the rest.
- xLights check sequence may complain about it (depending on the options selected)
- In some cases, the result of parallel render algorithms will not be stable. (This may be of little consequence, unless you are doing regression testing of xLights.)
Now, perhaps someday there will be an improvement to #1 above. However, what if we want to establish which submodels have priority, and make rendering stable as of today? In order to do that, without changing the number of nodes in a strand or anything else that would potentially change rendering significantly, we just want to replace the duplicate node with “,,” instead of removing it completely. This is what I refer to as “Suppress Duplicates”, and it is available on the strand or whole submodel.
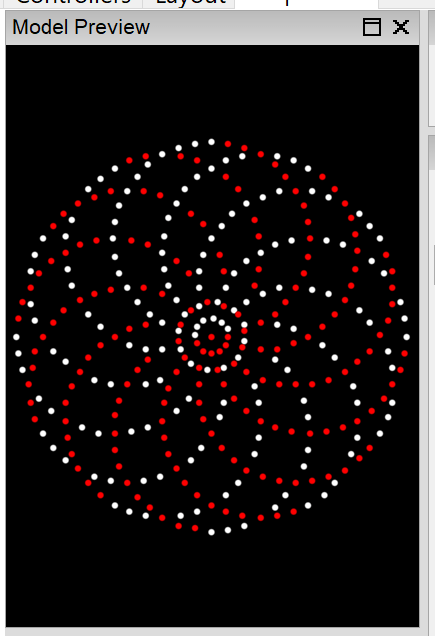
For the circles above, we may want all the circles to be treated the same, rather than the first taking priority. The available option would be “Suppress Duplicates All Left->Right” to assign the node to the first strand to use it as we read them collectively from left to right, as this will give the start of the chase priority over the end of the chase… the early part of the circle will be “in the front” and the latter part will be “in the back”:


We can see from subtle differences in the rendering that this has been effective:

If you want the top strand to take priority over the bottom (perhaps there are duplicate nodes in your rings, or something), you can choose “Suppress Duplicates All Top->Bottom”. This also matches much of the current xLights behavior, if you want to formalize it.
Please note: Eliding the duplicates in this manner is a matter of preference. If xLighs ever has a better way to “break ties”, it would have been better to leave the duplicates in. But, if you want rid of the duplicates, this is an easier way, with less consequences, than other methods.
Manually Suppress Nodes
In the same way that one selects nodes by drawing a rectangle in the submodel preview pane on the right, and presses “shift” to cause that action to remove nodes from the selection, it is now possible to hold down the Control key and have the nodes suppressed instead of removed from the selection. This allows manual generation of knockouts.
Making Outlines / Paths Around the Center
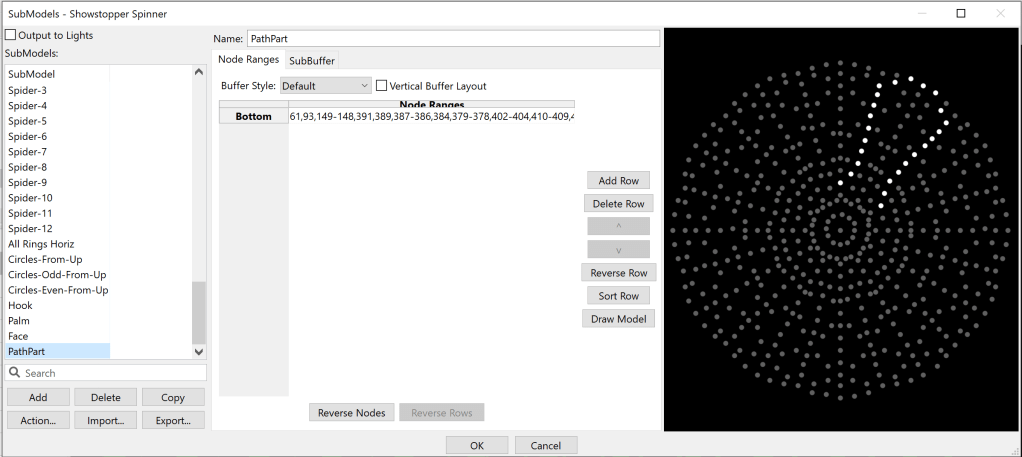
Sometimes, instead of a stranded model, the goal is to make an outline, or other path around the center of the spinner. This is a modest extension of the techniques already used above. First, start with a fraction of the path you want:
Then, symmetrize it. The next trick will be to pick “Combine Strands”, but before that, you might want to copy your submodel… you see, it could be that you don’t like the result of “Combine Strands”, and the easiest way to fix that is delete your attempt and try again…
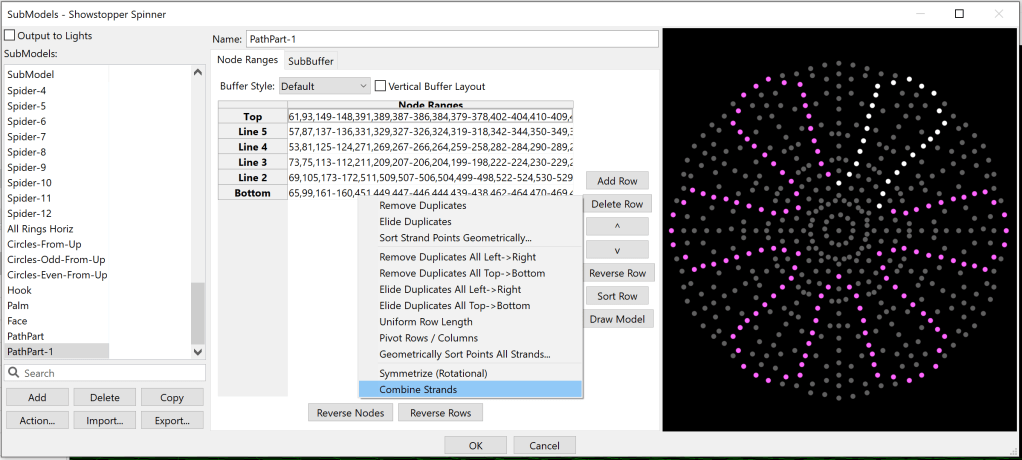
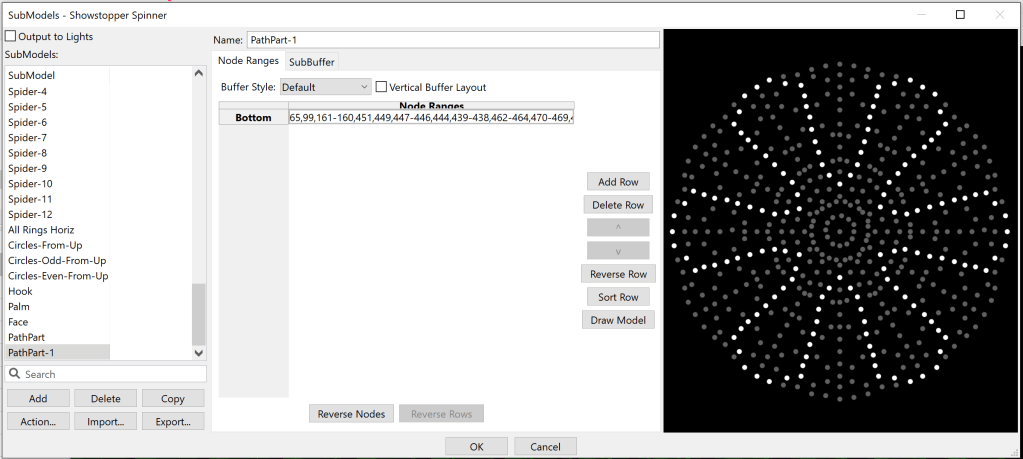
Now, you have a new strand model.
This, however, is not without its subtleties, many of which have easy fixes:
- If you are going counter-clockwise, you may need to push “Reverse Rows” before you “Combine Strands”
- If you accidentally got duplicates in your strand, try right clicking and “Remove duplicates”.
- If you don’t like the direction, maybe “Reverse Row” before you do anything.
- If you don’t like the order, try a geometric sort either before or after “Combine Strands”.
It could take some trial and error… which is why I suggested playing with a copy of the submodel you want to turn into a path.
Conclusion
I hope you’ve enjoyed this post. If you get to use these options, I hope they helped you… maybe by taking the tedium out of some task, or getting a better end result in less time. Then again, maybe I should not wish it on you, and instead hope that you are able to use the models you get without changes, so that you don’t have to spend time on creating submodels at all. With the caveat that some of my preferences may not suit yours, or not match some of the vendor’s original design points, you are welcome to any of the models I use in my show.
