Summary
If you want a trim line to be embellished with something a bit fancier than a single light string or plain icicles, the HolidayCoro PixelTrim system is an interesting option. Start with an ~8′ plastic strip that holds either 12mm pixels or C9 brilliant bulbs, attach (using zip ties or Pivot Connector Buttons) motifs to the strip, and pop in some pixels. Zip tie to a pipe and clip to the house for easy installation and removal, or mount any other way you’d like.
Thanks to the thoughtful design and high quality of the product, this is mechanically a very simple build. But, if you want to really get the most out of it in xLights, you’ll really want a lot of submodels – one for the light string, one for each motif, maybe even one for each submodel in each motif. That last bit is probably the valuable part of this blog post… I did that with a python script and if you’re brave, you can try to use it to generate the submodels for your own personal PixelTrim configuration.
My Project
I have a driveway arch made out of conduit that was lit with AC props in 2020 and 2021.
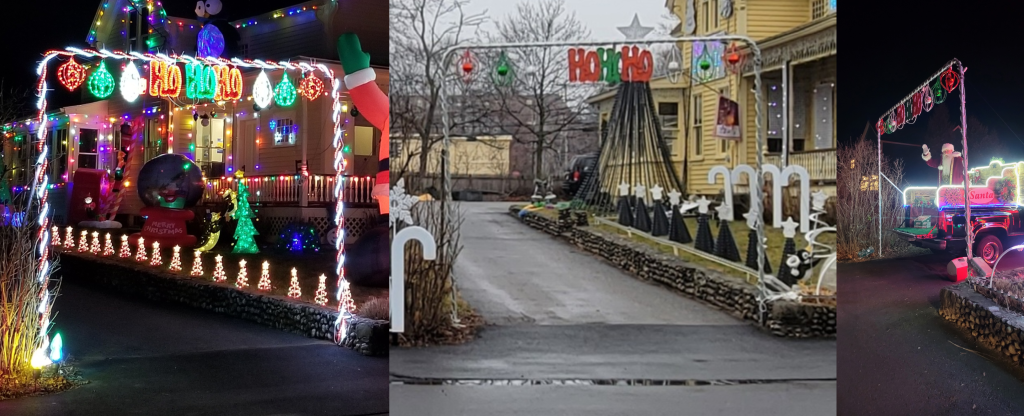
Last year (2021) I started adding pixels. I expected to put all the old A/C stuff on LoR controllers and add pixels also. It was quite ambitious, and I didn’t get very far adding the AC stuff, and a lot of it blocked the view of the pixels.

So, what really happened is I didn’t have an inspiring A/C element, and the arch left a big hole in the middle of the display when the music was on:

I decided to try out the PixelTrim system for this arch for 2022.
Mechanical Build
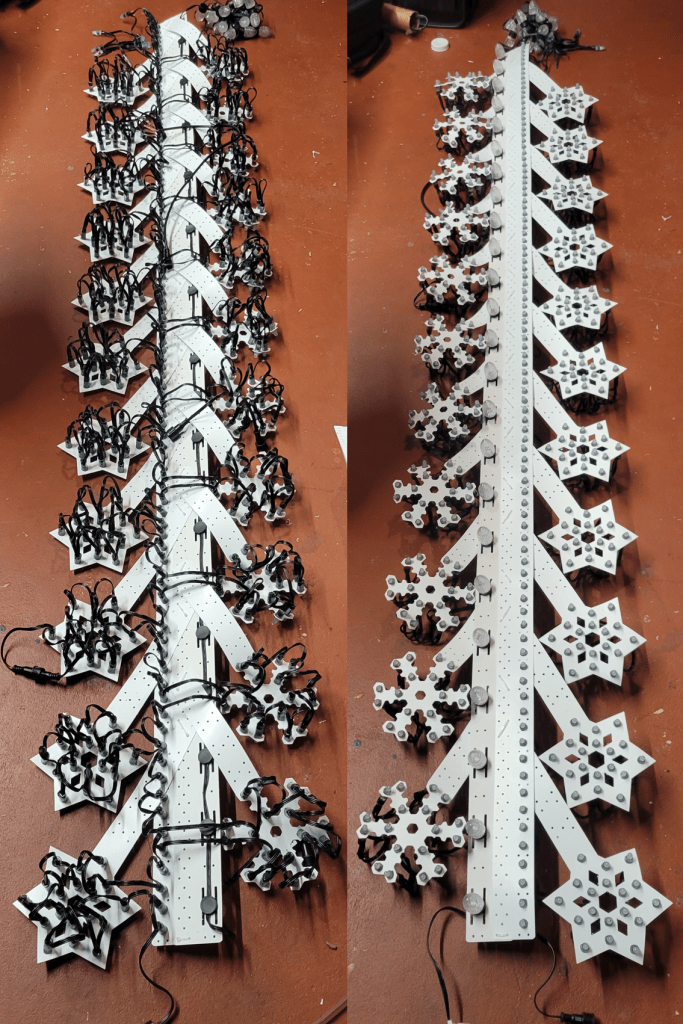
There will be 3 sections of PixelTrim, a vertical run on each side, and one horizontal across the top. (There will be props on the corners and hanging, but this will be revealed later… when I decide what they’ll be :-D) For this post, I’ll focus on one of the vertical runs.
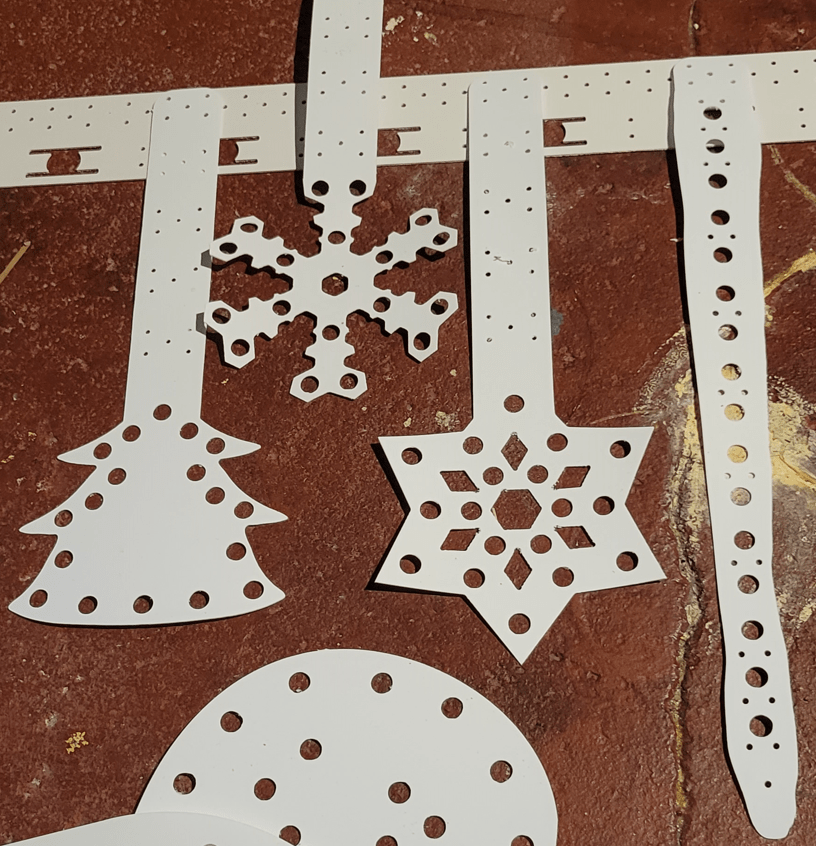
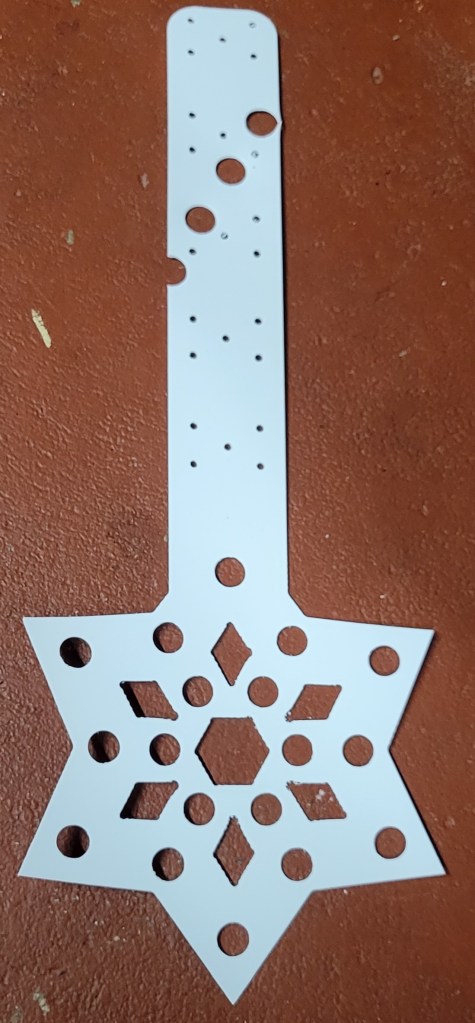
PixelTrim comes with a variety of motifs for winter/Christmas; I chose the two snowflakes. PixelTrim comes in white or black; I chose white. PixelTrim comes with holes for C9 Brilliant Bulbs or 12mm nodes; I chose both (and I reserve the right to zip tie a strip down the middle, too!).
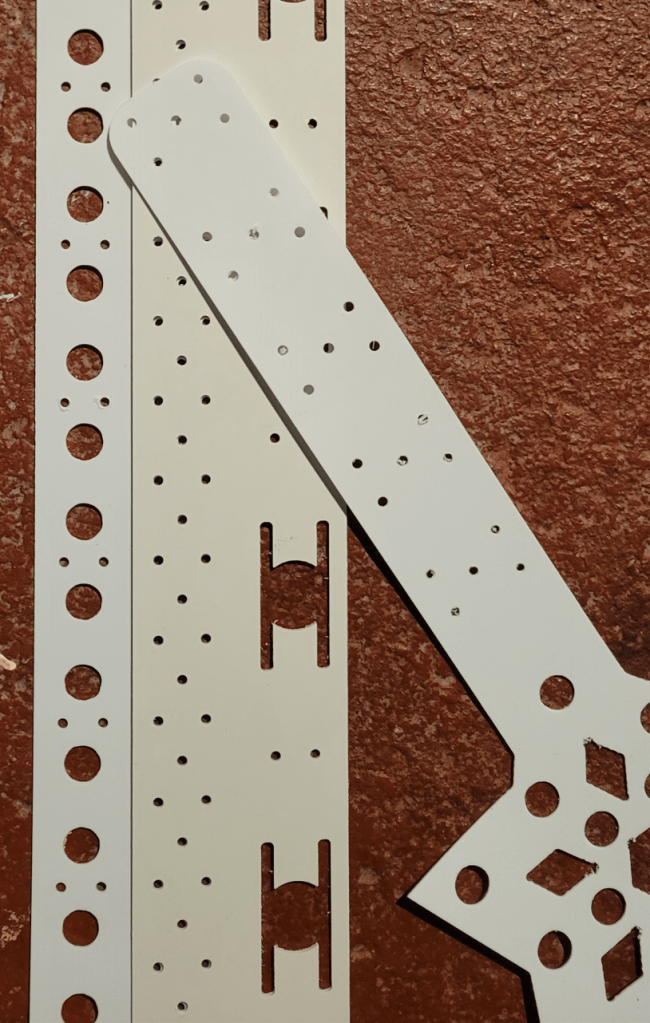
Assembly is quite straightforward. I opted for the zip ties to make the connections rigid:

Well, it was mostly straightforward. I did have to cheat and punch some holes so the bullets could pass through the motif stems.
Then I wired it up (the rest of the way). On the off chance you don’t have a preferred method for pushing pixels, I will say that I wore gloves, and pushed them into a 13mm socket to provide uniform support for the plastic sheet. After all the pixels were pushed in, I flipped the prop over and looked to make sure that each was snapped in properly; a few weren’t quite right but it was easy enough to wiggle them until they clicked all the way in.
Sequencing
It looks like the hard part is done, right? Now all we have to do is plug it in and it will light up, right? And it will. Just plug in the 24 C9 lights and that’s a nice string. Plug in the 491 other bullet pixels and… it will light up, and it would look pretty with a single strand effect on it too, but it won’t be amazing. With a prop with this much detail, we really ought to be able to get a mini-show on the strip itself.
What we really need is an xLights custom model. First, we start by making custom models for the mini flake motifs. You should probably make your own, as the wiring order matters, and I did wire them in from the sides. And I added submodels, and added the model and submodels to groups, as these are important steps for imports. Here are links to my custom models for reference:
Now, we could manually create a custom model for this, with a little cut and paste. And we could then make and group all the submodels. It could very well take an hour or two to do this, so, naturally, being a computer programmer by trade, I spent three or four hours writing a python script to do it for me.
It is a bit clunky, but you are free to reuse my python script. Just change the hardcoded strip length, direction, motif model files, number of pixels to the first and number between occurrences for each prop type, and run… it’ll make your composite model, all the submodels, and all the groups for you.
End Result
I ended up with the xLights custom model found here. To prove that it worked, I took the new “Mr. Santa” sequence from Pixel Pro Displays, and mapped as much of the sequence to the prop submodels as possible:
I’m also very satisfied with the real-life version:
Can’t wait to put it in the show next year, along with a lot more PixelTrim runs!
